Run Angular and dotnet core api app in docker container with docker compose — Part 3 — The Angular UI and docker


Hello Friends,
In this part we will be building our Angular UI to show the countries returned by the dotnet core API. I am going to call it as KnowThatCountryUI (ktcui)
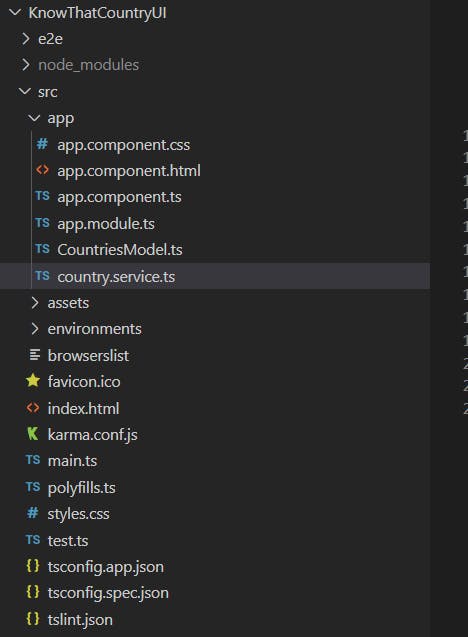
This is a very basic Angular application with the folder structure as below
We have one injectable service file which call the API and fetches the data.
import {Injectable} from '@angular/core'
import {HttpClientModule, HttpClient} from '@angular/common/http'
import { Country } from './CountriesModel';

@Injectable({
    providedIn:'root'
})
export class CountryService{

    apiURL="http://localhost:5005/Countries/GetAll"
    httpClient:HttpClient

    constructor(private thttpClient: HttpClient) {
        this.httpClient=thttpClient;

    }
    GetAll(){
        return this.httpClient.get<Country[]>(this.apiURL)

    }
}
This service is talking to the API service that we created in part 2 of this series which is running at port 5005 on local machine.
In the app.component.ts file, we inject that service as a dependancy and subscribe to the observable.
import { Component } from '@angular/core';
import { CountryService } from './country.service';

@Component({
  selector: 'app-root',
  templateUrl: './app.component.html',
  styleUrls: ['./app.component.css']
})
export class AppComponent {
  title = 'KnowThatCountryUI';
  countryService:CountryService;
  countries=[];

  constructor(private tCountryService:CountryService) {
      this.countryService=tCountryService;
      this.GetAll();
  }

  GetAll(){
    this.countryService.GetAll().subscribe(response=>this.countries=response);
  }
}
and in the app.component.html, we loop over the results and display them
<div style="text-align:center">
  <style>
    .grid-container {
      display: grid;
      grid-template-columns: auto auto auto;
      background-color: #2196F3;
      padding: 10px;
    }
    .grid-item {
      background-color: rgba(255, 255, 255, 0.8);
      border: 1px solid rgba(0, 0, 0, 0.8);
      padding: 20px;
      font-size: 30px;
      text-align: center;
    }
    </style>
  <h1>
    Welcome
  </h1>
    <div class="grid-container">
      <div  class="grid-item" *ngFor="let country of countries">
          <strong>{{ country?.name }}</strong>
          {{country?.capital}}
        </div>
      </div>
</div>
OK now our basic UI app is ready to talk to the service and show data.
Now, lets run it in a docker container by creating dockerfile.
Below is my docker file for UI. (dockerfile.ui)
FROM node:10.15.3-slim as build
WORKDIR /KTCUI
COPY src ./src
COPY *.json ./
RUN npm install -g @angular/cli@7.3.10
RUN npm install
RUN ng build --prod

FROM nginx:alpine as deploy
WORKDIR /KTCUI
COPY --from=build /KTCUI/dist/KnowThatCountryUI/*.* /usr/share/nginx/html/
Here we are using node:10.15.3-slim as the base image and installing all the angular dependencies from package.json file inside the container.
Notice the last 3 lines. To run the angular application, we are using nginx:alpine image as web server.
Now, we can build the image for our UI Application.
docker build -t ktcui -f dockerfile.ui .
and then run it by assigning a port.
docker run -it -p 5006:80 --name ktcui ktcui
In above command, we are assigning port 5006 on local machine with port 80 inside the container which is the default port for nginx.
Now, if we visit localhost:5006, we should be able to see our UI.
Thanks for reading.
In the next and the last part of this series, we will see how to pull this all together in one file and one command and stand up the applications together and get them working.